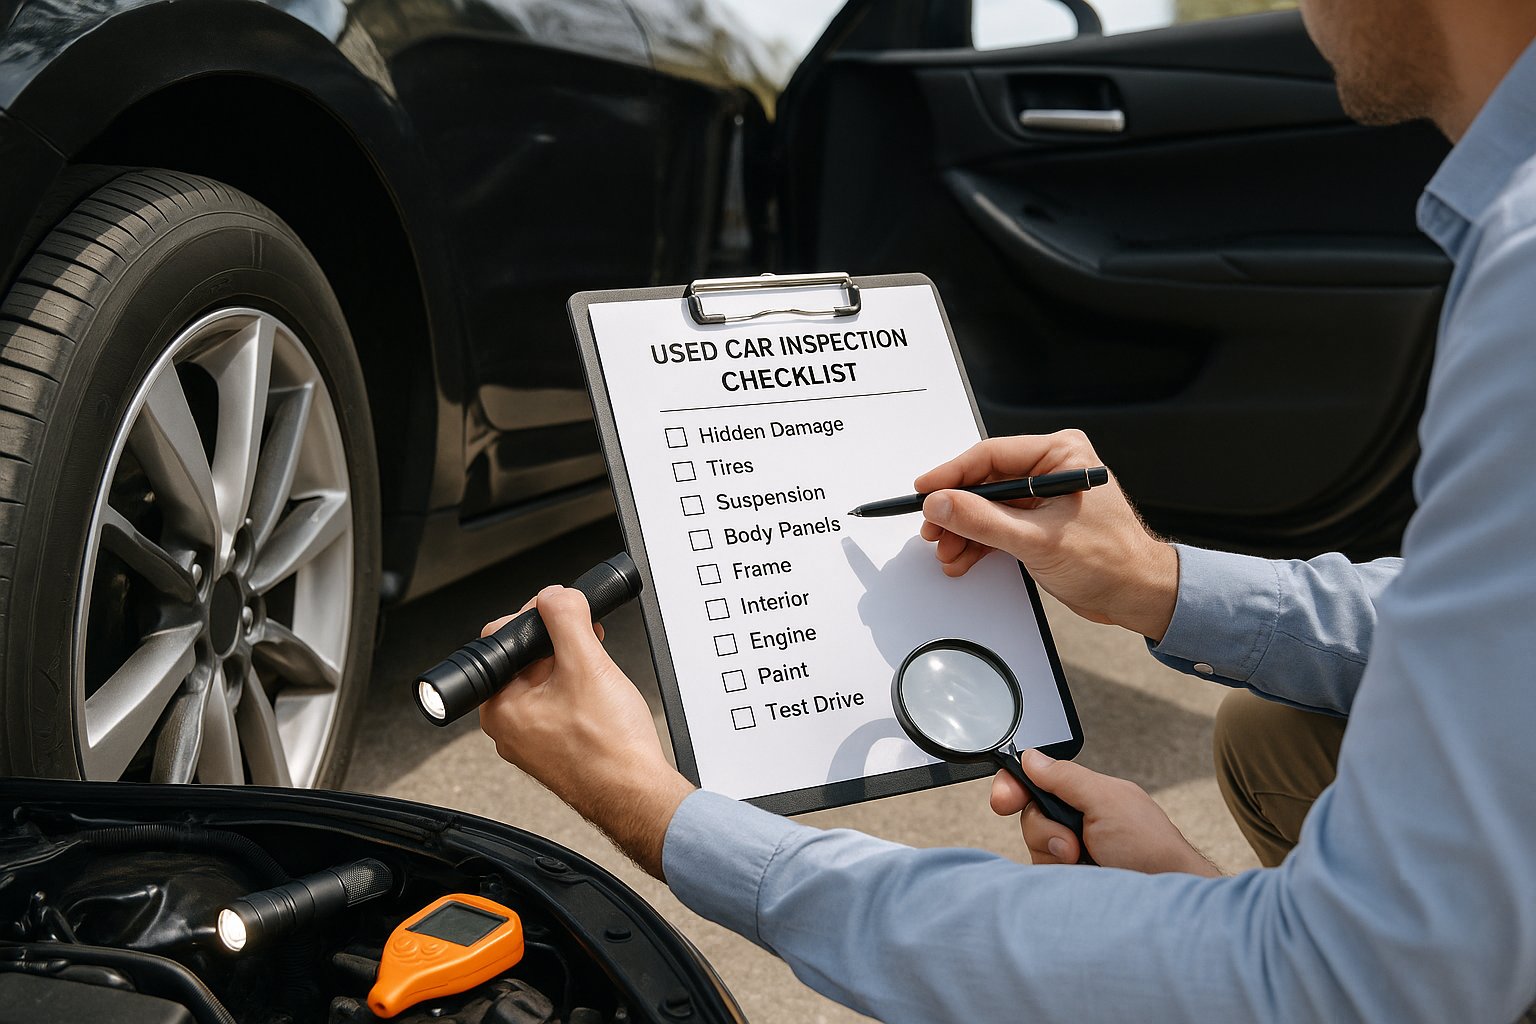
Used Car Inspection Checklist: Spot Hidden Damage Before You Buy
Used Car Inspection Checklist For Hidden Damage: Essential Steps To Avoid Costly Mistakes
Buying a used car might save you thousands, but hidden damage can flip that deal upside down fast. Most folks just look for obvious stuff like dents or scratches and miss the serious problems that could drain your wallet later.

A thorough inspection checklist helps buyers spot hidden structural damage, engine issues, and electrical gremlins that sellers might not mention. Smart buyers spend extra time on a detailed inspection to dodge expensive surprises later.
The trick is knowing what to check—and where. Hidden damage loves to lurk under the hood, around the wheel wells, or even in those boring maintenance records nobody wants to read.
Key Takeaways
- A systematic inspection checklist helps you catch hidden damage before you buy
- Look over the exterior, interior, engine, and take that test drive to sniff out mechanical issues
- Dig into all the vehicle documents and history reports so you really know what you're getting
Why a Used Car Inspection Checklist Is Essential

A used car inspection checklist shields buyers from expensive problems that some dealers or sellers might miss—or honestly, just hide. This step-by-step approach can save thousands in repairs and helps you feel a whole lot better about your decision.
Understanding Hidden Damage Risks
Used cars come with plenty of risks you won’t spot during a quick test drive. Accidents from the past can leave structural issues that mess with safety and performance.
Floods? Those can cause electrical headaches that don’t show up until months later. Rust hides under paint and body panels, sneaking up on you when you least expect it.
Engine trouble like worn gaskets or timing chain problems rarely show up on a short drive. Transmission issues might only pop up after driving in different conditions.
Frame damage from crashes weakens the whole car. That kind of hidden problem isn’t just expensive—it’s dangerous. Sometimes, sellers cover up collision repairs with paint touch-ups or body work that masks alignment and handling problems.
Some folks even pour stop-leak products into engines or transmissions right before you show up, just to hide big issues for a while. It’s sneaky, but it happens.
Benefits of a Comprehensive Vehicle Assessment
A good pre-purchase inspection uncovers trouble before you hand over your cash. Professional inspectors catch stuff that most of us would overlook.
Key inspection benefits include:
- Spotting expensive repairs before you buy
- Learning what shape the car’s really in
- Gaining leverage when it’s time to haggle
- Avoiding unsafe rides with hidden problems
A thorough assessment covers brakes, suspension, engine, and transmission. Inspectors dig for proper maintenance records and check for signs of neglect or abuse.
How Inspection Checklists Prevent Costly Mistakes
A PPI checklist keeps you from skipping important stuff. It’s easy to get distracted by shiny paint and forget to check the mechanics underneath.
Checklists walk you through exterior condition, interior wear, engine health, and safety features—step by step, so nothing slips through the cracks.
Common expensive mistakes you’ll avoid:
- Buying a car with a blown head gasket ($2,000-$4,000 repair)
- Missing transmission trouble ($3,000-$5,000 fix)
- Overlooking suspension damage ($800-$2,500 repair)
- Ignoring worn-out brakes ($400-$1,200 replacement)
Professional inspectors jot down everything they find on detailed checklists. That paperwork can help with insurance claims or warranty battles later.
Going through a complete checklist isn’t quick, but it’s way better than getting burned. You’re not just gambling when you buy a used car—you’re making a real, informed choice.
Preparation Before Inspecting a Used Car

If you want to do a proper inspection, you’ll need some prep. Bring the right tools, pick the right time, and do your homework before you even see the car.
Gathering Essential Tools
Don’t show up empty-handed. Grab a flashlight to peek into dark corners like wheel wells and undercarriage spots. A magnet comes in handy for sniffing out body filler where accidents might be hiding.
A tire tread depth gauge will tell you how much life is left in the tires. A small mirror helps you look in awkward spots underneath.
Jot down problems in a notebook or snap photos with your phone. These details make price negotiations a lot easier later.
If you want to go all out, consider hiring a professional pre-purchase inspection (PPI) service. They’ll bring fancy tools like paint gauges and diagnostic computers.
Scheduling the Inspection
Daylight’s your friend—aim for 10 AM to 3 PM. You’ll spot paint differences and body issues way easier when the sun’s out. Avoid rainy or cloudy days if you can; defects love to hide in bad light.
Give yourself at least an hour. Rushing means you’ll miss stuff you’ll regret later.
Meeting the seller at their place or workplace is usually best. Parking lots work if they’re well-lit, but skip crowded spots with bad lighting.
Make sure the car’s cold before you start. A warm engine can mask leaks or weird noises you need to hear.
Researching Vehicle Information
Get the vehicle identification number (VIN) ahead of time. That 17-digit code tells you the car’s whole story. Double-check the VIN on the car and the title—they should match.
Order a Carfax or AutoCheck report using the VIN. You’ll see accident history, flood damage, previous owners, and sometimes service records.
Look up the car’s market value on Kelley Blue Book or similar sites. Knowing what similar cars go for helps you negotiate with confidence.
Ask the seller for maintenance records if they’ve got them. Regular oil changes and repairs are a good sign. If records are missing, it could mean skipped maintenance—or something’s being hidden.
Exterior Inspection for Hidden Damage
A careful exterior inspection uncovers damage sellers might want to hide—or buyers just don’t notice. The body panels and paint tell you about accidents, rust hints at future headaches, and busted windows or lights can mean safety issues.
Assessing Body Panels and Paint Condition
Body panels should line up evenly. Gaps between doors, hood, and trunk need to be consistent—uneven gaps usually mean accident repairs or sloppy fixes.
Run your fingers along the panel edges. If you feel bumps or roughness, something’s off. Gaps should match from side to side.
Check for paint color changes under different lighting. Move around the car and look for weird shades or textures.
Paint condition reveals a car’s past. If one panel looks freshly painted while the rest is faded, that’s a clue.
Watch for orange peel texture, overspray, or tape lines by the trim. These signs usually mean body work that could be hiding bigger problems.
Wrap a magnet in a cloth and run it over metal panels. If it doesn’t stick somewhere, you might be feeling thick body filler from a past repair.
Checking for Rust and Previous Repairs
Rust loves to start in hidden spots before you ever see it. Check wheel wells, door frames, and around trim first.
Bubbling paint or tiny brown spots near panel joints are early warning signs. Ignore them now, pay for them later.
Look underneath doors and the trunk lid for rust holes or patch jobs. Most owners skip these areas during upkeep.
Previous repairs often leave clues if you look closely. Watch for welding marks, bumpy metal, or mismatched screws and bolts.
In the engine bay and trunk, check if all fasteners match. If not, someone’s been working there.
Feel around repair areas for rough edges or sharp metal. Quality work should feel smooth, not jagged.
Inspecting Windows, Mirrors, and Exterior Lights
Windows deserve a close look for chips, cracks, or signs they’ve been swapped out. Even a tiny chip in the windshield can turn into a giant crack.
Check window tint for bubbles, peeling, or scratches. Bad tint jobs or old film often look rough.
Inspect window seals for gaps or tears. Bad seals let water sneak in and could lead to electrical headaches.
Mirrors should move smoothly and give you a clear reflection. Cracks or distortion make driving riskier.
If it’s got heated mirrors, make sure they work. If not, you might be looking at electrical trouble or evidence of a past accident.
Exterior lights must all work. Turn on headlights, brake lights, signals, everything—don’t skip anything.
Moisture inside light housings or cracked lenses is bad news. Water in the lights can spread to other electrical bits.
Tires and Wheels Assessment
Tires and wheels can tell you a lot about how a car’s been treated—and what could go wrong next. Uneven wear, damage, or missing tools are all red flags for costly problems.
Evaluating Tire Tread and Wear Patterns
Check tread depth with the penny test. Stick a penny upside down in the groove—if you see all of Lincoln’s head, those tires are toast.
Uneven wear patterns have stories to tell. Cupping (scalloped dips) usually means bad shocks or struts. Edge wear can point to overinflation or hard cornering.
Inner edge wear often means underinflation or alignment problems. Center wear hints at overinflation. Feathering (smooth on one side, sharp on the other) usually signals alignment issues.
Check if all four tires match in brand and size. If not, maybe only the damaged ones got replaced. That’s not great for handling or traction.
If only two tires are new, ask the seller why. Sometimes, that’s a cover-up for accident damage.
Inspecting Wheel Condition
Wheels can show you evidence of crashes or neglect. Look for bent rims—if the wheels don’t sit straight, you’ll feel it while driving.
Scratches and gouges on the wheels usually come from rough parking or careless driving. Deep marks near the lug nuts could mean botched tire changes.
Corrosion and rust show up as white buildup on aluminum or brown rust on steel. Heavy corrosion weakens wheels and makes swapping tires a pain.
Spin each wheel and check for wobble. Look at the valve stems for cracks. Old rubber stems leak and need replacing.
Missing center caps or damaged lug nuts are signs of sloppy maintenance. Count all the lug nuts and make sure the patterns match up.
Checking Spare Tire and Tools
The spare tire's shape says a lot about how the owner treated the car. I always check the spare tire pressure with a gauge—spares tend to lose air just sitting there.
Full-size spares should look like the other tires, both in size and condition. Temporary spares (or “donuts”) are smaller and thinner, only meant for short trips at low speeds.
Buyers need to make sure all the tire-changing tools are actually in the car:
- Jack that works
- Lug wrench that fits the wheel bolts
- Jack handle or crank
- Wheel lock key if there are locking lug nuts
Missing tools? That’s just more money out of your pocket later. The jack should pump up and down smoothly, and definitely shouldn’t leak hydraulic fluid.
Try the lug wrench on a wheel bolt—just to make sure it fits. Some cars tuck tools away under floor panels or in little side compartments. I’d hunt down every tool before signing anything.
Under the Hood: Engine and Fluid Inspection
A good engine inspection tells you a lot about a car’s story. Fluid levels, colors, and textures can reveal issues that aren’t obvious at first glance.
Examining Engine Oil and Coolant
Engine oil is like the car’s report card. Pull the dipstick and check the oil level right away.
If it’s low, that could mean leaks or just plain neglect. The oil should sit comfortably between the dipstick’s minimum and maximum marks.
Fresh oil looks clean and amber. If it’s black and dirty, it’s overdue for a change. Gritty oil or visible metal flakes? That’s a big red flag for engine wear.
Coolant keeps the engine from overheating or freezing. Only check the coolant reservoir when the engine’s cold. Never pop the radiator cap on a hot engine—seriously, don’t.
Good coolant looks clear and bright—usually green, orange, or pink, depending on the type. If it’s rusty or muddy, that’s bad news. Oil floating in the coolant usually points to a blown head gasket, which is a nightmare repair.
Checking Transmission and Brake Fluids
Transmission fluid keeps things shifting smoothly. Check it while the engine’s running and warm, if possible.
It should look bright red and smell a bit sweet. If it’s dark, brown, or smells burnt, you could be looking at pricey transmission repairs.
Metal flakes in the fluid? That’s a sign of internal wear. Some cars don’t have a dipstick for this—just another thing to keep in mind.
Brake fluid is non-negotiable for safety. Find the reservoir near the back of the engine bay.
Fresh brake fluid is clear or just a little yellow. If it’s dark or murky, braking performance will suffer and parts can get damaged.
Low brake fluid can mean worn pads or leaks—both are expensive and need fixing fast.
Assessing Battery, Belts, and Hoses
The battery should have clean terminals—no white or green gunk. If there’s a lot of corrosion, that battery might be on its last legs.
Make sure the battery cables feel tight. Loose ones cause weird electrical gremlins and starting headaches.
Belts should look smooth, with no cracks or fraying. Press down on each one. They should give a little, but not feel floppy.
If you hear squealing when starting up, the belts might be worn or loose. A broken belt can take out the alternator, water pump, or even the A/C.
Hoses move coolant and other fluids around. Give them a squeeze—if they feel mushy or brittle, that’s not good.
Check for leaks around hose ends. Cracked or bulging hoses can pop without warning, and that’ll leave you stranded with an overheating engine.
Interior and Electronics Evaluation
An interior inspection tells more than you’d think—about both wear and how the car was treated. Electronics can hide issues that won’t show up until later.
Reviewing Interior Condition and Upholstery
The inside of a car says a lot about its past. I’d check every surface for damage or heavy wear.
Seats—look for rips, stains, or sagging. Leather cracks and fades in the sun, while fabric can hide old spills or pet smells that only show up later.
Dashboard and trim need a close look. Cracks around air vents or the glove box are common. Warped or faded trim? Probably heat or bad storage.
Lift up the carpet and floor mats to check for water damage. Rust or water stains could mean flood history. New carpet in an old car always makes me suspicious.
Windows and mirrors should move smoothly. Slow electric windows often mean expensive repairs. Make sure all mirrors adjust and aren’t cracked.
Testing Dashboard, Controls, and Infotainment
Modern electronics aren’t cheap to fix. I’d test every button, switch, and screen before buying.
Start the engine and watch the dashboard lights. They should all light up briefly, then go out. If any stay on, that’s a problem.
Climate controls should work at all speeds—test both heat and A/C. If airflow is weak or temps don’t change quickly, something’s up.
The infotainment system deserves a full check—radio, Bluetooth, navigation, all of it. Touchscreens should respond, and USB/charging ports need to work.
Test power seats, heated seats, sunroofs—one by one. These fail often in older cars, and repairs aren’t cheap.
Examining Safety Features and Odors
Safety systems and weird smells can reveal big issues that aren’t obvious at first glance.
Airbag lights shouldn’t stay on after startup. If they do, the airbags might not work in a crash—fixing that can get pricey.
Seatbelts should retract smoothly and latch easily. Frayed or sticky belts make me wonder about past accidents or neglect.
Sniff around for odd odors. Musty smells usually mean water leaks or mold. Sweet scents can point to coolant leaks. Burnt smells? Could be electrical or mechanical trouble.
Smoke residue shows up as yellow stains on windows and trim. Smoke damage hurts resale and leaves behind odors that are tough to kill.
Test Drive: Detecting Hidden Mechanical Issues
A test drive uncovers things you just can’t spot by looking. Steering, brakes, transmission, and engine noises all tell their own stories.
Assessing Steering and Suspension
The steering wheel should feel smooth and centered. If it pulls to one side, something’s off—maybe alignment or tires.
Try gentle turns at low speeds. The wheel should turn easily, with no weird looseness or stiffness.
Steering warning signs:
- Steering wheel vibration
- Hard to keep the car straight
- Grinding or whining when turning
- Loose, sloppy steering
Drive over a few bumps. The suspension should soak them up without bouncing all over.
Listen for clunks or rattles from the wheels. Those usually mean worn shocks or suspension parts.
While parked, turn the wheel all the way left and right. Squealing means possible power steering issues or low fluid.
Evaluating Braking and Transmission Performance
Start with gentle braking at low speed. The pedal should feel firm and stop the car evenly.
With the engine running and the car parked, press the brake pedal. If it sinks slowly, there’s probably a brake fluid leak.
Brake warning signs:
- Squealing or grinding noises
- Vibration when braking
- Soft or spongy pedal
- Car pulls to one side when stopping
Automatic transmissions should shift smoothly—no jerks or hesitation. If it slips or revs high between gears, that’s trouble.
Test reverse and park to make sure they engage right away. Manuals should shift without grinding or sticking.
Check that the parking brake holds the car on a slope. If it doesn’t, expect a repair bill.
Listening for Unusual Noises
Engine noises can warn you about expensive problems. It should run quietly—no knocking, ticking, or weird rhythms.
Squealing belts at startup or with the A/C on usually mean they’re worn out. Not the end of the world, but still a sign of neglect.
Problem sounds to watch for:
- Knocking: Possible engine damage or bad fuel
- Ticking: Oil pressure issues or worn parts
- Grinding: Could be brakes or transmission
- Whining: Power steering or differential trouble
Pay attention to the exhaust. Loud rumbling can mean exhaust system problems, which affect emissions and safety.
Turn off the radio and crack the windows so you can really listen. Some sellers try to cover up noises with music or chatter.
Notice when certain sounds happen—during acceleration, braking, turning, or idling. That info helps mechanics figure out what’s really wrong.
Reviewing Documentation and Vehicle History
Papers can reveal a car’s past in ways a quick look never will. VIN, title, recalls, and service records all matter if you want to avoid surprises.
Verifying VIN and Title Status
The VIN is the car’s fingerprint. Double-check it on the dashboard, door frame, and engine block—they should all match.
The title shows who legally owns the car and if there are any liens. Clean titles mean no major damage history. Salvage, flood, or lemon titles? Walk away.
Red flags:
- VIN numbers that don’t match
- Missing or tampered VIN plates
- Salvage or flood titles
- Lots of owners in a short time
Make sure the seller’s name matches the title. If you’re buying from a dealer, they should handle the transfer paperwork.
Checking for Open Recalls
Open recalls mean safety defects the manufacturer has to fix for free. If they’re unresolved, you could be on the hook later.
The NHTSA website lets you search recalls by VIN. Just type in the 17 digits and see what comes up.
Big recall categories:
- Airbag issues
- Brake failures
- Engine or transmission defects
- Electrical problems
Sellers should show proof that recalls got fixed. If not, you might want to negotiate or just skip the car.
Inspecting Service Records
Service records tell you if the last owner cared about maintenance. Regular oil changes and repairs are a good sign.
Look for records of oil changes, brake work, tire rotations, and big repairs. No records? Could mean hidden problems.
Maintenance to check for:
- Oil changes every 3,000-7,500 miles
- Brake pad and fluid replacements
- Transmission service history
- Timing belt changes if the car’s got high mileage
Vehicle history reports from Carfax or AutoCheck add more details. They pull info from insurance, repair shops, and the DMV to spot accidents or flood damage.
Questions to Ask and Final Considerations
Before buying, ask the seller about the car’s history and condition. A professional inspection can catch problems you might miss.
Critical Questions for Sellers
Ask about the car's accident history. Go ahead and ask for details about any crashes, even the little fender benders. Insurance claims and repair records usually spill the truth.
Find out why they're selling. Honest sellers tend to explain their reasons pretty clearly. If their story keeps changing or sounds sketchy, that's a red flag.
Get maintenance records. Ask to see service receipts or even just oil change records. When someone keeps good records, you know they cared at least a bit about the car.
Learn about previous owners. Try to find out how many folks have owned the car. If it's been passed around a lot in a short time, well, that's suspicious.
Check warranty status. Ask if there's any original or extended warranty left. This can affect how much you pay now—and what you might pay later.
Verify the title status. Make sure the seller actually has a clear title in hand. Ask straight up about any liens or loans that could get in the way of transferring ownership.
Deciding on a Professional Pre-Purchase Inspection
A PPI costs $100 to $200 but can save thousands. A good mechanic can spot hidden damage most buyers miss. They'll check for engine trouble, electrical gremlins, and even frame issues.
Schedule the inspection at an independent shop. Don't just go with the seller's buddy—pick someone with no skin in the game.
Get the inspection before negotiating price. The mechanic's report gives you ammo for making a lower offer. Sometimes, what they find makes it worth walking away entirely.
Ask for a written report. The inspector should give you a write-up, pictures and all. You'll want that for bargaining and maybe even future repairs.
Finalizing Negotiations and Next Steps
Use inspection findings to negotiate price. Subtract repair costs from the asking price. Bring estimates from local shops if you've got them—it's hard to argue with proof.
Set a firm maximum price before talking. Decide your limit based on what the car's worth and what it needs. Try not to get caught up in the moment and go higher than you planned.
Get all agreements in writing. If the seller promises repairs or extras, write it down. Seriously, it saves headaches later.
Arrange financing before buying. Check out loans from banks or credit unions. Pre-approval usually gives you more leverage than whatever the dealer offers.
Plan the title transfer and registration. Bring the right documents and payment. If you mess up the paperwork, you could end up with legal trouble you don't want.
Frequently Asked Questions
People buying used cars definitely want to spot hidden damage before it's too late. Here are some things to check during a pre-purchase inspection that really matter.
What should I look for when inspecting the bodywork of a pre-owned vehicle?
Check for rust around the wheel wells, door frames, and trunk. Rust starts small but can get out of hand fast.
Look for mismatched paint between panels. That usually means body work after an accident.
Run your hand along the panels—feel for ripples or weird bumps. Smooth is good, anything else could mean past damage.
Check the gaps between doors, hood, and trunk. If they're uneven, the car might've been in a crash.
How can I identify signs of engine problems during a used car inspection?
Listen for odd noises while the engine runs. Knocking, clicking, or grinding usually means trouble.
Check the oil—if it's black and thick, maintenance probably wasn't a priority.
Look underneath for fluid leaks. Oil, coolant, or transmission fluid on the ground? Not a good sign.
Watch the exhaust when you start the car. Blue smoke means the engine's burning oil, and that's expensive.
What are the essential checks to perform on a car's suspension system before purchase?
Push down on each corner and let go. The car should bounce once and settle—if not, the suspension's tired.
Glance at the tires for weird wear patterns. If the edges are worn or there's cupping, the suspension's probably off.
Look for leaks around the shock absorbers. Wet or oily shocks need to be replaced soon.
Listen for clunks when you drive over bumps. That sound almost always means worn suspension parts.
Which electrical system components must be included in a thorough vehicle inspection?
Test every light—headlights, brake lights, turn signals. Burned-out bulbs are easy, but you want to know now.
Turn on the ignition and check that all warning lights come on, then go off when the engine starts. If any stay on, that's a problem.
Try out the AC, heater, radio, and power windows. Fixing these can get pricey fast.
Check that the battery terminals are clean and tight. Corrosion here can cause all sorts of headaches.
How do I assess for previous unreported accident damage on a used car?
Look for fresh paint or primer on any panels. New paint sometimes hides accident repairs.
Check under the hood and trunk for welding marks or rough metal work. That usually means major repairs happened.
Measure the distance between the wheels on both sides. If it's not the same, the frame might be bent.
Look for new bolts or screws that don't match the originals. It's a subtle sign, but it can reveal a lot.
What is the best way to evaluate the condition of a vehicle's transmission and drivetrain?
Start by shifting through all the gears while you drive. If the shifts feel smooth, that's usually a good sign.
Take a look at the transmission fluid. If it's red, you're in good shape, but brown or burnt-smelling fluid? Yeah, that's not great.
Listen closely for any grinding or whining noises when you change gears. Those sounds could spell trouble, and honestly, nobody wants to deal with expensive repairs.
Pay attention to any vibrations you feel through the steering wheel or even the floor. Vibrations often point to issues with the drivetrain, which can get complicated fast.
on’t trust a clean report blindly.
Our AI-powered check uncovers inconsistencies that others miss — like hidden flood branding, title washing, and mileage red flags.
👉 Run a Free Check at VINspectorAI.com
Uncover Complete Vehicle History Reports
Discover critical vehicle information before you buy. Our VIN decoder reveals accident records, title status, recalls, and service history to help you make informed decisions.